Leg Exercises

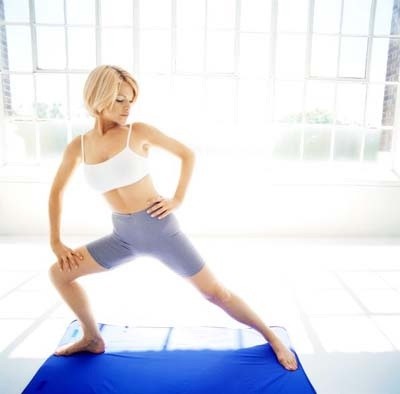
The range of leg exercises included in this workout routine tone not only the major muscle groups in the legs but the gluteals as well. Strengthening these powerful muscles -- which allow you to run, jump, and climb stairs -- can make it easier to participate in your favorite activities, from gardening to playing basketball. Remember: It's important to perform leg exercises that target all the major muscle groups so as not to create a strength imbalance.

leg exercise
Strengthening your legs will make many daily activities easier.

For more great exercises to improve your strength and fitness, check these out:

This information is solely for informational purposes. IT IS NOT INTENDED TO PROVIDE MEDICAL ADVICE. Neither the Editors of Consumer Guide (R), Publications International, Ltd., the author nor publisher take responsibility for any possible consequences from any treatment, procedure, exercise, dietary modification, action or application of medication which results from reading or following the information contained in this information. The publication of this information does not constitute the practice of medicine, and this information does not replace the advice of your physician or other health care provider. Before undertaking any course of treatment, the reader must seek the advice of their physician or other health care provider.
Advertisement

Outer Thigh Lift

The goal of the outer thigh lift is to strengthen the hip and outer thigh. The movement requires moving the leg away from the midline of the body.

Outer Thigh Lift Step 1

Step 1
Lie on your right side with right arm extended out straight, head resting on arm. Place your left arm in front of your chest for support. Keep your hips aligned, bending your right leg for a wide base of support.

Outer Thigh Lift Step 2


Step 2
Lift left leg up and out from hip socket. Lift out for 2 counts and lower for 4 counts, resisting as you lower your leg to starting position. Repeat for 8 times. Repeat on the other side. Progress gradually to 3 sets of 8 on each side.

For more great exercises to improve your strength and fitness, check these out:

This information is solely for informational purposes. IT IS NOT INTENDED TO PROVIDE MEDICAL ADVICE. Neither the Editors of Consumer Guide (R), Publications International, Ltd., the author nor publisher take responsibility for any possible consequences from any treatment, procedure, exercise, dietary modification, action or application of medication which results from reading or following the information contained in this information. The publication of this information does not constitute the practice of medicine, and this information does not replace the advice of your physician or other health care provider. Before undertaking any course of treatment, the reader must seek the advice of their physician or other health care provider.

Advertisement

Outer Thigh Press

The outer thigh press strengthens the hip and outer thigh muscles by contracting them through a short range of motion.

Outer Thigh Press Step 1

Step 1
Lie on your right side with right arm extended out straight, head resting on arm. Place your left arm in front of your chest for support. Keep your hips aligned, bending your right leg for a wide base of support. Lift left leg so that knee is parallel to the floor and foot is several inches from floor.

Outer Thigh Press Step 2

Step 2
Press left leg up several inches for a short range of motion and return to starting position. Remember to exhale on exertion. Repeat for about 8 times. If your muscles should fatigue, rest and continue when you are ready. Repeat on the other side. Progress to 3 sets of 8 on each side.

For more great exercises to improve your strength and fitness, check these out:

This information is solely for informational purposes. IT IS NOT INTENDED TO PROVIDE MEDICAL ADVICE. Neither the Editors of Consumer Guide (R), Publications International, Ltd., the author nor publisher take responsibility for any possible consequences from any treatment, procedure, exercise, dietary modification, action or application of medication which results from reading or following the information contained in this information. The publication of this information does not constitute the practice of medicine, and this information does not replace the advice of your physician or other health care provider. Before undertaking any course of treatment, the reader must seek the advice of their physician or other health care provider.

Advertisement

Butt and Thigh Press

In the butt and thigh press, the outer thigh and hip muscle groups are in a static contraction, while the quadriceps in the front of the thigh and gluteals in the buttocks perform the movement that extends the leg at the hip and knee.

Butt and Thigh Press Step 1

Step 1
Lie on your right side with right arm extended out straight, head resting on arm. Place left arm in front of chest for support. Keep hips aligned, bending right leg for a wide base of support. Lift left leg so that knee is parallel to the floor and foot is 4 inches from floor. Keep abdominal muscles held in tight.

Butt and Thigh Press Step 2

Step 2
Bend left leg slightly, using the hip and knee joints, through a short range of motion and then straighten. Don't lock your knee joint when straightening. Always move with a slow and controlled motion. Concentrate on the contraction through the butt and thigh. Repeat for 8 counts and rest. Repeat on the other side.

For more great exercises to improve your strength and fitness, check these out:

This information is solely for informational purposes. IT IS NOT INTENDED TO PROVIDE MEDICAL ADVICE. Neither the Editors of Consumer Guide (R), Publications International, Ltd., the author nor publisher take responsibility for any possible consequences from any treatment, procedure, exercise, dietary modification, action or application of medication which results from reading or following the information contained in this information. The publication of this information does not constitute the practice of medicine, and this information does not replace the advice of your physician or other health care provider. Before undertaking any course of treatment, the reader must seek the advice of their physician or other health care provider.

Advertisement

Compound Joint Press

The compound joint press is called "compound" because it uses more than one joint action. It strengthens the outer thigh, hip, quadriceps in the front of the thigh, and gluteals in the buttocks.

Compound Joint Press Step 1

Step 1
Lie on your right side with right arm extended out straight, head resting on arm. Place your left arm in front of your chest for support. Keep your hips aligned, bending your right leg for a wide base of support. Lift leg slightly. Hold abdominal muscles in tight.

Compound Joint Press Step 2

Step 2
Lift left leg up and out from hip socket on count 1. Use a smooth and controlled lift.

Compound Joint Press Step 3

Step 3
Bend left leg at the knee on count 2 and straighten it through the knee joint on count 3, moving slowly. Do not lock your knee joint. Slowly lower leg to starting position on count 4. Repeat for 8 times. Repeat on other side. Progress to 3 sets of 8 on each side.

For more great exercises to improve your strength and fitness, check these out:

This information is solely for informational purposes. IT IS NOT INTENDED TO PROVIDE MEDICAL ADVICE. Neither the Editors of Consumer Guide (R), Publications International, Ltd., the author nor publisher take responsibility for any possible consequences from any treatment, procedure, exercise, dietary modification, action or application of medication which results from reading or following the information contained in this information. The publication of this information does not constitute the practice of medicine, and this information does not replace the advice of your physician or other health care provider. Before undertaking any course of treatment, the reader must seek the advice of their physician or other health care provider.

Advertisement

Inner Thigh Lift

The inner thigh lift conditions the muscles in opposition to those conditioned in the outer thigh lift. It strengthens the inner thigh by requiring the leg to move toward the midline of the body.

Inner Thigh Lift Step 1

Step 1
Lie on your right side with right arm extended out straight, head resting on arm. Place your left arm in front of your chest for support. Keep your hips aligned. Bend left leg in front of your body with inner foot resting on floor.


Inner Thigh Lift Step 2

Step 2
Lift right leg up toward the ceiling, concentrating on pressing up. Lower the leg, resisting the movement on the way down. Repeat for 8 times. Repeat on the other side and progress to 3 sets of 8 on each side.


For more great exercises to improve your strength and fitness, check these out:

This information is solely for informational purposes. IT IS NOT INTENDED TO PROVIDE MEDICAL ADVICE. Neither the Editors of Consumer Guide (R), Publications International, Ltd., the author nor publisher take responsibility for any possible consequences from any treatment, procedure, exercise, dietary modification, action or application of medication which results from reading or following the information contained in this information. The publication of this information does not constitute the practice of medicine, and this information does not replace the advice of your physician or other health care provider. Before undertaking any course of treatment, the reader must seek the advice of their physician or other health care provider.

Advertisement

Inner Thigh Squeeze

Now you can lie on your back and relax as you condition and tone the muscles of the inner thigh. Keep your knees relaxed if you feel that your hamstrings are tight.

Inner Thigh Squeeze Step 1

Step 1
Lie on your back with legs extended toward the ceiling, aligned with hip sockets. Keep knees bent comfortably depending on the flexibility of your hamstrings. Place your arms alongside body with palms on the floor.

Inner Thigh Squeeze Step 2

Step 2
Close and open your legs slowly without extending your legs out beyond the hip line. To increase the intensity of the exercise, you can place your hands on the insides of your thighs and push outward to add resistance as you close your legs. Repeat for 8 times and progress to 3 sets of 8 times.

For more great exercises to improve your strength and fitness, check these out:

This information is solely for informational purposes. IT IS NOT INTENDED TO PROVIDE MEDICAL ADVICE. Neither the Editors of Consumer Guide (R), Publications International, Ltd., the author nor publisher take responsibility for any possible consequences from any treatment, procedure, exercise, dietary modification, action or application of medication which results from reading or following the information contained in this information. The publication of this information does not constitute the practice of medicine, and this information does not replace the advice of your physician or other health care provider. Before undertaking any course of treatment, the reader must seek the advice of their physician or other health care provider.

Advertisement

Quadriceps Extension

The quadriceps extension strengthens the quadriceps and helps maintain the placement of the kneecap.

Quadriceps Extension Step 1

Step 1
Lie on your back with both knees bent and both feet on the floor. Rest arms alongside your body. Make sure your shoulders, arms, and neck are relaxed.

Quadriceps Extension Step 2

Step 2
Slowly straighten right leg, keeping the thigh in line with left thigh. Slowly return to starting position. Repeat for 8 times. Repeat with the other leg. Progress to 3 sets of 8 with each leg.

For more great exercises to improve your strength and fitness, check these out:

This information is solely for informational purposes. IT IS NOT INTENDED TO PROVIDE MEDICAL ADVICE. Neither the Editors of Consumer Guide (R), Publications International, Ltd., the author nor publisher take responsibility for any possible consequences from any treatment, procedure, exercise, dietary modification, action or application of medication which results from reading or following the information contained in this information. The publication of this information does not constitute the practice of medicine, and this information does not replace the advice of your physician or other health care provider. Before undertaking any course of treatment, the reader must seek the advice of their physician or other health care provider.


Advertisement

30-Degree Press

The 30-degree press is similar to the quadriceps extension except that you extend the leg only through its last 30 degrees of movement, which makes it a press through a short range of motion. It's a great exercise to help strengthen the quadriceps and knees.

30-Degree Press Step 1

Step 1
Lie on your back with both knees bent and both feet on the floor. Rest arms alongside your body. Make sure your shoulders, arms, and neck are relaxed. Raise right leg so that thigh is in line with the left thigh.

30-Degree Press Step 2

Step 2
Bend right knee about 30 degrees and pull it toward your chest. Repeat for 8 times. Rest if necessary. Repeat with the left leg. Progress to 3 sets of 8 with each leg.

For more great exercises to improve your strength and fitness, check these out:

This information is solely for informational purposes. IT IS NOT INTENDED TO PROVIDE MEDICAL ADVICE. Neither the Editors of Consumer Guide (R), Publications International, Ltd., the author nor publisher take responsibility for any possible consequences from any treatment, procedure, exercise, dietary modification, action or application of medication which results from reading or following the information contained in this information. The publication of this information does not constitute the practice of medicine, and this information does not replace the advice of your physician or other health care provider. Before undertaking any course of treatment, the reader must seek the advice of their physician or other health care provider.

Advertisement

Pelvic Tilt

Relax on your back and concentrate on the contraction of the buttocks muscle while you hold the abdominals in tight. This exercise strengthens the buttocks and releases the back.

Pelvic Tilt Step 1

Step 1
Lie on your back with legs hip-width apart, both knees bent, and both feet on the floor. Place arms alongside body with palms down. Keep head and shoulders relaxed.

Pelvic Tilt Step 2

Step 2
Hold abdominals in as you rotate and tilt your pelvic girdle up toward the ceiling with a smooth and controlled motion. Repeat for 8 times and progress to 3 sets of 8 times.

For more great exercises to improve your strength and fitness, check these out:

This information is solely for informational purposes. IT IS NOT INTENDED TO PROVIDE MEDICAL ADVICE. Neither the Editors of Consumer Guide (R), Publications International, Ltd., the author nor publisher take responsibility for any possible consequences from any treatment, procedure, exercise, dietary modification, action or application of medication which results from reading or following the information contained in this information. The publication of this information does not constitute the practice of medicine, and this information does not replace the advice of your physician or other health care provider. Before undertaking any course of treatment, the reader must seek the advice of their physician or other health care provider.

Advertisement

Bent-Knee Hip Extension

In the bent-knee hip extension, the hamstring stays held in contraction while the buttocks muscle contracts. The exercise conditions and strengthens the buttocks and the backs of the thighs. People with high blood pressure should not lower the head.

Bent-Knee Hip Extension Step 1

Step 1
Start on all fours with your knees bent directly under your hip bones, weight supported on elbows. Keep elbows shoulder-width apart and forearms flat on the floor, hands crossed. Hold your abdominals in and keep your hips tucked up toward the ceiling to prevent arching your back.

Bent-Knee Hip Extension Step 2

Step 2
Keeping knee bent, lift left leg through full range of hip motion up toward the ceiling. Do not lift thigh above your hips. As you lift, contract and squeeze your gluteals. Lower the leg and repeat for 8 times. Repeat with right leg. Progress to 3 sets of 8 with each leg.

For more great exercises to improve your strength and fitness, check these out:

This information is solely for informational purposes. IT IS NOT INTENDED TO PROVIDE MEDICAL ADVICE. Neither the Editors of Consumer Guide (R), Publications International, Ltd., the author nor publisher take responsibility for any possible consequences from any treatment, procedure, exercise, dietary modification, action or application of medication which results from reading or following the information contained in this information. The publication of this information does not constitute the practice of medicine, and this information does not replace the advice of your physician or other health care provider. Before undertaking any course of treatment, the reader must seek the advice of their physician or other health care provider.

Glut Lift 'n' Cross

The glut lift 'n' cross strengthens the hamstring and buttocks muscles and contours the area around the hip. It's a little more advanced and can be skipped if you're short of time.

Glut Life 'n' Cross Step 1

Step 1
Start on all fours with your knees bent directly under your hip bones, weight supported on elbows. Keep elbows shoulder-width apart and forearms flat on the floor, hands crossed. Hold your abdominals in and keep your hips tucked up toward the ceiling to prevent arching your back.

Glut Lift 'n' Cross Step 2

Step 2
Keeping knee bent, lift left leg through full range of hip motion up toward the ceiling. Do not lift thigh above your hips. As you lift, contract and squeeze your gluteals.

Glut Life 'n' Cross Step 3

Step 3
Return leg to starting position, holding knee just off the floor, close to inside of right calf.

Glut Lift 'n' Cross

Step 4
Lift leg to hip height again and lower leg by crossing it to the outside of right calf. Return to starting position and repeat for 8 times. Repeat with right leg. Progress to 3 sets of 8 with each leg.

For more great exercises to improve your strength and fitness, check these out:


This information is solely for informational purposes. IT IS NOT INTENDED TO PROVIDE MEDICAL ADVICE. Neither the Editors of Consumer Guide (R), Publications International, Ltd., the author nor publisher take responsibility for any possible consequences from any treatment, procedure, exercise, dietary modification, action or application of medication which results from reading or following the information contained in this information. The publication of this information does not constitute the practice of medicine, and this information does not replace the advice of your physician or other health care provider. Before undertaking any course of treatment, the reader must seek the advice of their physician or other health care provider.

Hamstring Curl

The hamstring curl strengthens the back of the thigh and works the muscles opposite to those strengthened in the quadriceps extension. Doing both of these exercises will help keep the thigh muscles balanced.

Hamstring Curl Step 1

Step 1
Start on all fours with your knees bent directly under your hip bones, weight supported on elbows. Keep elbows shoulder-width apart and forearms flat on the floor, hands crossed. Hold your abdominals in and keep your hips tucked up toward the ceiling to prevent arching your back. Straighten left leg and lift up to hip height, toes pointed toward floor.

Hamstring Curl Step 2

Step 2
Bend the knee and concentrate on the contraction in the hamstring. Straighten left leg through the knee joint with a slow, controlled motion. Repeat for 8 times. Repeat with right leg. Progress to 3 sets of 8 with each leg.

For more great exercises to improve your strength and fitness, check these out:

ABOUT THE AUTHOR

Lisa Faremouth is a fitness specialist who is a certified exercise instructor and member of the American Council on Exercise and the Aerobic Fitness Associates of America. She was awarded a silver medal in the Reebok National Aerobic 1989 Championships for the Midwest region and has served as director of exercise programs for a large health club in Chicago. Through her company, Fitfully Yours, she provides education, consultation, training, and workshops to fitness centers, corporations, and individuals worldwide.

This information is solely for informational purposes. IT IS NOT INTENDED TO PROVIDE MEDICAL ADVICE. Neither the Editors of Consumer Guide (R), Publications International, Ltd., the author nor publisher take responsibility for any possible consequences from any treatment, procedure, exercise, dietary modification, action or application of medication which results from reading or following the information contained in this information. The publication of this information does not constitute the practice of medicine, and this information does not replace the advice of your physician or other health care provider. Before undertaking any course of treatment, the reader must seek the advice of their physician or other health care provider.

Advertisement

Loading...