10 Steps to Do Your Own Manicure

manicured hands
Get your digits in order with a diy manicure.
iStockphoto/Thinkstock

Your nails are front and center for life's activities. Just think of how often during an average day you -- and everyone around you -- get a gander at your ragged cuticles, shameful hangnails and torn, sorry nails. What, have you been out digging in the yard barehanded with those things?

Your nails should reflect your inner goddess, or at least your inner well-groomed goddess wannabe. When you want nice nails but a trip to the nail salon won't fit into your schedule (or your budget), we've got you covered. On the next pages, you'll learn everything you need to know about how to transform your naughty nails into fabulous finger paintings.

Advertisement

10: Set up Your Work Area

Grabbing a bottle of nail polish, polish remover and a paper towel for an impromptu manicure during your favorite reality show is a recipe for disaster. A home manicure can look professional, but it takes planning and preparation. When you pay for a manicure, a professional manicurist uses both hands to do the job. For most of your DIY manicure, you'll be one hand short of a pair, so it pays to have all of your tools out and ready to go. You'll avoid fumbling, frustration and mishaps.

These are some common tools you'll be using:

Advertisement

  • cotton balls or pads
  • nail polish remover
  • nail trimmers
  • nail cleaning tool
  • buffing tool
  • nail file
  • cuticle tool
  • cuticle cream
  • gentle hand soap
  • moisturizer
  • nail polish
  • top coat

Location is another important consideration: Use a flat, solid surface that's large enough to accommodate your hands and supplies. The area should also have good light, good ventilation and be free of dust, lint and pet hair. Having something to distract you, like music playing in the background, is a good idea, too. Looking at your beautiful nails can be mesmerizing, but watching nail polish dry is a big yawn.

9: Remove the Old Polish

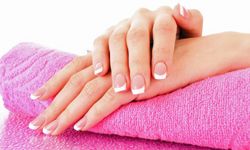
Remove any old, chipped nail polish with polish remover and pads or cotton balls. There are a number of products available that combine pads and polish remover solvent, employ an applicator or offer an alternative to acetone (the most common nail polish removal solvent on the market).

Whether you use an acetone or non-acetone based polish remover is a matter of personal choice. There are advantages and disadvantages to both products.

Advertisement

  • Acetone - Acetone works fast and is pretty reasonably priced. It contains flammable solvents like 2-propanone and toluene that can be drying to nails and skin.
  • Non-acetone - Non-acetone products require a little more elbow grease, but they're less damaging to your nails and leave your cuticles feeling less dry and stiff. Non-acetone nail polish formulas typically contain ethanol and acetic acid. Many also have added moisturizers. You may pay a little more for a non-acetone product, but using it won't leave your room smelling like a chemical plant.

Note: If you're trying to remove specialty nail polish like the sparkly variety, it might respond better to an acetone nail polish remover. Nail polish formulas are always changing. If you think you might have a problem getting your polish off and want to take the non-acetone route, have an acetone product as a backup.

Both acetone and non-acetone formulations have been known to cause eye irritation, dizziness, shortness of breath, headache, confusion and nausea in certain individuals.

8: Shape and Smooth Your Nails

file nails
Find a length that works for you.
Brand X Pictures/Thinkstock

There's actually a science to trimming nails. Nails have a grain, so bidirectional trimming is definitely a no-no that leaves them slightly ragged. Instead, always file your nails in one direction, from the bottom edge to the center top. Alternate from one side of the nail to the other until you create a smooth, rounded curve. If your nails are a lot longer than you want them to be, trim them with nail clippers before you start shaping them. It will save time. As you shape your nails, work to create a modified crescent with a slightly flattened top. It's a popular, flattering and maintenance-free nail shape.

Advertisement

7: Clean Your Nails

No great painter ever started his masterpiece with a dirty canvas, and neither should you. Before you transform your digits into works of art, you need to clean them. Excavate under your nails with a spoon-edged nail cleaning tool, and then wash and dry your hands thoroughly to remove dirt, nail dust, grease and polish remover residue. It's also a good idea to soak your nails in warm, soapy water for a few minutes. It will soften your cuticles for the next step.

Advertisement

6: Apply Cuticle Cream

cuticle cream
The cream's the thing.
Hemera/Thinkstock

Cuticles don't get the respect they deserve. They perform an important function: They create a barrier that protects your emerging, developing nails from infection. Your nails are exposed to damaging substances, heat and cold, friction and pressure. They can become brittle when you don't provide them with the proper nutrition, like a diet rich in protein and iron. They deserve a good start in life, and that's what your cuticles give them.

To keep your nails looking good, keep your cuticles healthy and in shape. Cuticle creams soften and revitalize cuticle tissue, keeping it soft but snug around the nail. This helps seal out bacteria. A good nail cream contains moisturizers that keep the cuticle supple, and humectants like alpha hydroxy acid that help cuticle tissues retain moisture. Apply cuticle cream or oil to your nails regularly, especially before you give yourself a manicure. If you don't have cuticle cream, use olive oil.

Advertisement

5: Reposition Your Cuticles

After the cuticle cream has had time to work, use a blunt cuticle stick to push the cuticle of each nail back to the base of the nail. Don't ever cut your cuticles. Removing that layer of skin may sound like an attractive idea, but it's just asking for a nail infection or injury. Once you've gently repositioned the cuticle at the base of each nail, moisturize your hands and wipe them dry. Be sure to remove any oil residue. Lingering oil residue will keep nail polish from making a good, permanent bond.

Advertisement

4: Buff Your Nails

buffing nails
Use the right tools, and you can't go wrong.
iStockphoto/Thinkstock

If your clean, dry nails are nice and smooth, you can proceed to the next step. If they're rough or ridged, though, you may want to buff them first. Nail polishing creams and special polishing boards can smooth out the surface of nails that have grooves or ridges as a result of aging or injury. Nail buffing is actually a handy alternative to a manicure. It has the same appearance as applying a clear coat. Give it a try. You'll be surprised at how shiny, lustrous and healthy your nails look. If the idea of buffing your nails doesn't appeal to you, use a nail filler product that will conceal minor nail flaws like ridges and discoloration.

Advertisement

3: Apply a Base Coat

This is the part where many DIY manicures go wrong. Apply a very thin first layer of polish to your nails. Very thin. Swipe each nail three times, covering a third of the nail with each stroke. Include just a bit of an overlap per stroke. Allow the polish to dry completely. Letting nail polish dry undisturbed is the single most important step in any manicure. Some nail polish dries faster under UV light or in sunlight. You can also use a fan to speed drying time. Don't rush. Great nails are worth the wait.

Advertisement

2: Add Additional Coats of Polish

Additional coats of nail polish will often produce a deeper, richer finished color. Check the polish label for recommendations. With some nail polish brands, you can apply up to three coats. Always let each layer dry completely before proceeding to the next.

This is usually the time when you'll start to get restless. After all, if you've been doing a thorough, conscientious job, you've been at this manicure thing a while. The only problem with causing a smudge now is that it could be hard if not impossible to smooth away, leaving you with a wonky nail or a major overhaul job. Take it easy, and be patient. Crank up your tabletop fan and think positive thoughts. Your nails are going to look spectacular.

Advertisement

1: Apply a Top Coat

Nail polish top coat goes on like regular nail polish but is completely transparent. It dries shiny and super hard. This is an extra step that will make your nail polish stronger and less prone to chipping. It will also keep it shinier longer. If you do plan to use a top coat, consider choosing a complementary product. Most nail polish manufacturers produce their own lines of top coat -- which are optimized for their nail polish. When you stock up on nail supplies, keep that in mind.

Nail polish top coat has another nice feature: You can reapply it as needed. If you've ever noticed your polish dulling down between treatments, a shiny refresher may be just the thing to keep your nails glossy until you're ready to change your color from blue to fire engine red.

Lots More Information

Related Articles

  • Beauty Geek. "Hard Wear: Revlon Adds UV Touch to New Colorstay Longwear Nail Enamel — It Doesn't Need a UV Lamp to Cure." 10/11. (4/26/12). http://imabeautygeek.com/2011/10/31/hard-wear-revlon-adds-uv-touch-to-new-colorstay-longwear-nail-enamel-it-doesnt-need-a-uv-lamp-to-cure/
  • CareFair. "Nail Polish Removers, Are they Dangerous?" (4/26/12). http://www.carefair.com/beauty/nails/nail_polish_removers_1484.html
  • Foster, Linda. "Do-It-Yourself Manicures at Home." Everyday Health. 7/29/09. (4/26/12). http://www.everydayhealth.com/skin-and-beauty/manicures-at-home.aspx
  • Hey, Nice Nails! "Nail Art." (4/26/12). http://heynicenails.com/
  • Lund, Georgia. "Tips for Cheap and Perfect DIY Manicure." Yahoo Voices. 11/4/11. (4/26/12). http://voices.yahoo.com/tips-cheap-perfect-diy-manicure-10355093.html?cat=69
  • Marie Claire. "Do It Yourself Manicure." (4/26/12). http://www.marieclaire.com/hair-beauty/how-to/manicure-do-it-yourself
  • McMurray, Shandley. "DIY Manicure Tips." Kaboose. (4/26/12). http://just-for-mom.kaboose.com/your-gorgeous-manicure.html
  • Milrad Goldstein, Melissa. "DIY Manicure & Pedicure." Better Homes and Gardens. (4/26/12). http://www.bhg.com/health-family/mind-body-spirit/stress-relief/manicure-pedicure/
  • Morales, Tatiana. "Getting A Safe Manicure." CBS News. 2/11/09. (4/26/12). http://www.cbsnews.com/2100-500168_162-636817.html
  • Nail Aid. "7 Tips for a Perfect Manicure." (4/26/12). http://www.nailaidcares.com/7manitips.php
  • She Knows. "7 step do-it-yourself French manicure." (4/26/12). http://www.sheknows.com/beauty-and-style/articles/6589/step-doityourself-french-manicure
  • YouTube. "How To: Give Yourself A Manicure." 8/15/09. (4/26/12). http://www.youtube.com/watch?v=7gN8CEE_WoY

Advertisement

Loading...