10 Steps to Do Your Own Pedicure

DIY pedicures are great for girls' night in.
Jupiterimages/Brand X Pictures/Thinkstock

Each year when winter ends, the warm weather rituals begin -- planting new flowers, buying spring clothes, getting outdoors. Among these time-honored traditions is the summer pedicure -- a time when women everywhere soak, file, pumice and polish until their toes are sandal-ready.

As wonderful as it feels to get a pedicure while you flip through the latest People magazine, salon pedicures take time and money that you don't always have. Years ago, I realized that regular salon or day spa pedicures can break the bank. So, I went the budget route, using an inexpensive walk-in place and ended up with a nasty little foot condition that made me swear off cheap pedicures forever. After all, there's nothing like a foot fungus to put the damper on summer sandals.

Advertisement

So what's a girl to do? Well, like The Home Depot used to say, "You can do it. We can help." A do-it-yourself (DIY) pedicure saves money, time, and you can schedule it whenever you want -- even 11 o' clock at night. The DIY pedicure can also be a great girls-night-in event, mother/daughter moment or a romantic evening of pampering if your significant other is willing to play along.

For your home pedicure, you'll need some supplies:

  • tub or basin
  • soaking salts or bubble bath
  • towels
  • cuticle oil
  • nail file, clipper and cuticle stick
  • pumice stone and foot file
  • polish -- a top/base coat and color
  • cotton pads (neater & more precise than cotton balls)
  • foot cream
  • nail polish remover

Now let's get started. We'll show you how to do this in 10 easy steps.

1: Remove Old Polish

This first step isn't exactly rocket science, but it's amazing how many women leave polish on their nails, hoping it will eventually chip away. But no matter how much time goes by, there's always one stubborn patch that refuses to leave. Worse, if left over time, old polish can cause nail discoloration. So, be sure to remove any old polish before starting your pedicure.

At the drugstore, you'll see both acetone and non-acetone polish removers. Acetone is better for removing color but the ingredients can dry out your skin. Non-acetone polish remover is gentler because it was originally used for synthetic nails, but it won't remove your nail color as well as acetone. So what do you choose? Use an acetone polish remover, but go easy on the cuticle area, where the acetone can really dry out the skin.

Advertisement

2: Soak your Tootsies

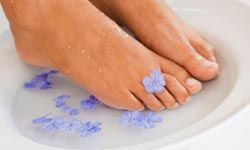
Soaking your feet for about 10 minutes will soften them without making them pruneish.
Pixland/Thinkstock

Now it gets fun! Fill a small tub, bowl or basin with warm water, add some bubble bath and Epsom salts, then sit back and relax. Soaking softens the skin, preparing it to be pumiced, filed and trimmed, and the salts soothe tired, sore feet. Another option is scented oils which smell wonderful, moisturize your skin and give you that spa feeling at home. You can also buy commercial foot soaks, usually made with peppermint or eucalyptus oils. To make your soaking time even more luxurious, buy an electronic, bubbling foot spa from your local drugstore or beauty supply store.

Ten minutes is a good amount of time to soak your feet. This softens your skin without turning you into a raisin, and gives some moments to decadently relax without wasting too much time. Keep your favorite gossip magazine handy for this part of your pedicure.

Advertisement

3: Take Care of Your Cuticles

OK, girls, now you actually have to move again. Take out one foot, pat it dry and add a drop of cuticle oil to the skin around your nail bed. Massage it in and using a cuticle stick (wooden or plastic), gently push that dead skin back. Rub the oil in all around the toenail, softening up any rough spots or snags in the skin. Plop your foot back in the basin and repeat on the other side.

Even though a pedicurist may have cut your cuticles at the spa, most dermatologists don't recommend it, so you really don't want to be doing it at home. Clipping and cutting opens you up -- literally -- to the risk of infection. Instead, keep your feet and your cuticles moisturized, and the cuticle stick can manage any ragged edges.

Advertisement

4: Exfoliate

Exfoliating with a salt scrub will get rid of the dead skin.
Jupiterimages/Goodshot/Thinkstock

Next, you want to exfoliate your feet and legs, sloughing away that dry, dead skin. This step is important as it helps soften calluses and rough spots, smoothes your skin and allows fresh, healthy skin to shine through.

You'll find plenty of exfoliating foot scrubs at your drugstore, or you can make your own with kosher salt and olive oil. Some girls like to use exfoliating gloves in conjunction with the scrub.

Advertisement

Take one foot out of the tub, and gently massage the scrub into your foot and leg, moving in an upward motion for two or three minutes. Then repeat on the other foot and leg. This process not only feels heavenly but also stimulates your circulation and dissolves all your day-to-day stress with each motion!

Before moving on, rinse off your feet in your tub or basin, removing any excess foot scrub. For that spa feeling, microwave a damp towel for 15 seconds and use it to clean off your feet. It'll feel so good you may even give yourself a tip!

5: Buff

Calluses are areas on your feet -- usually found around the heel, ball of the foot and on the side of the big toe -- where the skin has hardened due to constant pressure and friction. An athlete, like a runner or dancer, will have calluses thanks to consistent practice. Likewise, footwear like high heels or tight shoes can have the same effect.

To treat calluses, you have a few options. There are pumice or callus stones that you use, preferably on damp skin, to soften the callus and any snags or rough patches. Another tool that some women prefer is a foot file -- similar to a callus stone, it has a bit more abrasion to it to smooth the skin. (You can also use these tools just to take dead skin off your heels.) Regardless of what you use, stop if it hurts or if you break the skin.

Advertisement

The key here is to smooth the callused area, not remove or cut the callus. Aside from the infection risk, calluses, however unattractive, protect our feet. Taking away that protective layer is like putting baby skin in the sun without SPF; the skin is vulnerable. I learned this lesson the hard way when I had a pedicure (and got my calluses shaved) the day before a tennis match. I don't remember if I won or lost but I do remember hobbling to the bathroom that evening to soak my newly blistered feet.

6: Moisturize

This step is rather simple but important and feels great: Rub a nice thick foot cream or lotion on your feet and legs, moving in an upward motion, A nice touch is to add some drops of peppermint oil to the lotion for a tingly feeling. Additionally, you can find heel creams with shea butter.

For even more hydration, try a foot mask, similar to a facial mask with one exception -- after you apply the mask, you typically want to wrap your feet in plastic wrap or plastic baggies while the mask sets -- definitely not something you do to your face!

Advertisement

You can find various products at the drugstore or beauty store. Or, for a homemade mask, blend a few cucumbers, with some lemon juice and olive oil. Put equal parts of the mixture in two baggies, slide your feet in and relax.

After 10 minutes or so, remove and rinse your feet, moisturize, and continue onto Step 7.

7: Trim

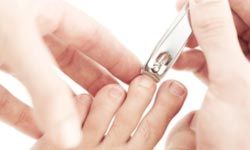
For best results, use a toe clipper with a curved edge.
Ingram Publishing/Thinkstock

Now's the time to start shaping your toenails, getting them prepped to paint. How short should you clip? Well, a good standard is that you want to be able to run your finger across the top of your foot and have your toenails barely grazing your finger.

Using a clean nail clipper -- curved clippers are usually easiest to work with -- clip straight across, careful not to cut too close to the edge of the skin. It sounds simple enough, but too often, we clip too much, causing uncomfortable hangnails and ingrown nails. To prevent this, a smart recommendation is to clip the edges at a 45 degree angle. Clipping at this angle won't give you smooth, sleek nails but that's where Step 8 comes into play. So let's move on.

Advertisement

8: File

On TV, you've probably seen the stereotypical image of a secretary or administrative assistant, snapping her gum, talking on the phone in a bored voice, and filing her nails back and forth, back and forth. In real life, that's not what you want to do on either fingernails or toenails. The back and forth motion actually weakens your nails.

Starting from the outer edge where you've clipped your nail at a 45 degree angle, lightly file into the center of the nail. Repeat this motion several times until you've got a nice, smooth edge on that side. Then, do the opposite side from where you started, using the same gentle stroke and filing towards the center of the nail.

Advertisement

A square, or "soft square" is a good shape to create; making an oval shape gets you too close to the skin, again causing those ingrown nails. File so that you have a uniform look across, and then you're ready for color!

9: Polish and Dry

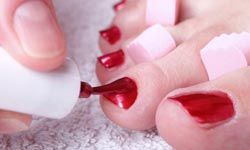
Always apply your polish with vertical strokes.
iStockphoto/Thinkstock

Now it's time to look pretty. First, take a cotton pad dipped in nail polish remover, and swipe it across each toenail to remove any moisturizer or oils. All that lubrication is great for your skin, but it doesn't help your polish last.

A great purchase for a DIY pedicurist is a toe separator (see photo at left); that way, you can actually walk around with wet toenails rather than having to stay still. Tissues or toilet paper works in a pinch but aren't as neat.

Advertisement

After choosing your color, roll it between the palms of your hands to get it ready. It's as effective as shaking the bottle but won't create air bubbles. Apply polish like this:

  • base coat; wait two minutes
  • first coat of polish; wait two minutes
  • second coat of polish; wait two minutes
  • top coat

All too often, all the pampering and preparation that goes into a pedicure, be it in a salon or at home, gets ruined at the very end because no one has the patience for the drying process. Don't use a hair dryer as it just makes the polish gummy. Quick dry nail polishes or top coats have alcohol which makes polish chip easier. If you need a quick dry product, choose an oil or spray. Even better, go the old-fashioned route and just wait it out, preferably for 15-20 minutes. After all, you've worked too hard to spoil it all at the end.

10: Clean Up

One of the benefits of a DIY pedicure is that you know the instruments and tools you use are clean but only if you actually clean them. So, your final step is to clean your supplies so they're ready to use the next time.

  • Wash and rinse the foot basin or tub. Sanitize with a bleach mixture -- 95 percent water; 5 percent bleach.
  • Rinse clippers, or any other metal instruments, with hot water, and use a sanitizing spray as well.
  • Pumice and callus stones, cuticle stick, nail and foot files should be washed with warm water and mild soap (baby soap or shampoo is always a great choice). You don't want to scrub as you'll wash away the abrasives that make these tools useful.
  • Close the caps tightly on polishes so they don't dry out and on the polish remover so it doesn't leak. Store your polish in a cool, dry place.
  • Wipe all the instruments dry or give them ample time to dry out before packaging up for next time.
  • As your tools of the trade become worn or too dirty, replace them.
  • Put everything away in the same place so that you remember where it is for your next pampering session.

Now, sit back, kick those pretty tootsies up on the table and admire your work.

Lots More Information

Related Articles

  • Cohen, Arianne. "In the Eye of the Befuddled: Five Beauty Decisions We've Made for You." O, The Oprah Magazine. Spetember 2008. (May 14, 2012). http://www.oprah.com/style/Beauty-Decisions-Made-Easy
  • The Cosmetics Cop, Paula's Choice. "Home Manicures and Pedicures." (May 11, 2012). http://www.cosmeticscop.com/body-nail-care-home-manicures-pedicures.aspx
  • Curtis, Jae. "How to Use a Foot File for Smooth Feet." Daily Glow. (May 16, 2012). http://www.dailyglow.com/how-to-use-a-foot-file-for-smooth-feet.html
  • Fuentes, Carla. "Nail Salon Secrets for a Perfect Manicure and Pedicure at Home." Daily Glow. (May 9, 2012). http://www.dailyglow.com/nail-salon-secrets-for-a-perfect-manicure-and-pedicure-at-home.html
  • Mayo Clinic. "Fingernails: Do's and don'ts for healthy nails." (May 15, 2012). http://www.oprah.com/style/Beauty-Decisions-Made-Easy
  • McMurray, Shandley. "At-Home Pedicure Tips." Kaboose. (May 10, 2012). http://just-for-mom.kaboose.com/diy-pedicure-tips.html
  • Putnal, Olivia. "Give Yourself the Perfect At-Home Pedicure." Woman's Day. (May 10, 2012). http://www.womansday.com/style-beauty/beauty-tips-products/give-yourself-the-perfect-at-home-pedicure-107307
  • Sally Beauty. (May 15, 2012). http://www.sallybeauty.com/What-is-the-difference-between-acetone-and-non-acetone-nail-polish-remover%3F-Which-is-best%3F/FAQ_NAILS_023,default,pg.html
  • Sassybella. "Sooth your feet with a homemade foot mask." Jnauary 1, 2011. (May 18, 2012). http://www.sassybella.com/2011/01/soothe-your-feet-with-a-homemade-foot-mask/
  • Schuler, Charli. "The Best Do-It-Yourself Pedicure Tips." Total Beauty. (May 9, 2012). http://www.totalbeauty.com/content/flash/c_home_pedicure
  • Schurman, Aysha. "Avoid Infection and Keep your Pedicure Tools Clean." Life123. (May 14, 2012). http://www.life123.com/beauty/grooming/pedicure/pedicure-tools.shtml
  • WebMD. "Calluses and Corns -- Topic Overview." January 6, 2010. (May 16, 2012). http://www.webmd.com/skin-problems-and-treatments/tc/calluses-and-corns-topic-overview
  • WebMD. "Calluses and Corns: Using Pumice Stones." January 6, 2010. (May 17, 2012). http://www.webmd.com/a-to-z-guides/calluses-and-corns-using-pumice-stones-topic-overview

Advertisement

Loading...