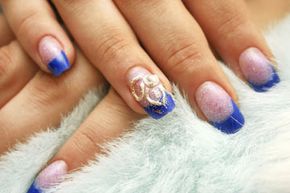
Nail art is super-hip right now and 3D nail art – where you add embellishments to your fingernails -- takes it up a notch. It might seem a little bit daunting at first, but with the right tools, you can create unique designs that stay put at least for a date or a girls night out.
My sister, Amanda Levine, is a nail art champ. Every time I see her, she's wearing some new designs, and she was kind enough to share some of the tools, resources, and techniques that she uses to create 3D nail art.
Advertisement
Before you plan a design, figure out what elements you want to work with. Beauty supply stores like Sally Beauty Supply and even drug stores sell small nail art embellishments like beads, bows, decals, and miniature cameos. Amanda recommends checking out Artbeads.com for Swarovski crystals on the cheap. For nail art, you want to go with the smallest ones they have.
You'll also want a good quality polish to use as a base, plus a few colors and a clear top coat. Black and white polishes are a lot of fun to use as bases for nail art. The last thing you'll need is nail glue, like the kind you use to glue on fake nails. You should be able to find nail glue at a beauty supply store or a drug store.
Here's the basic technique to creating your nail art:
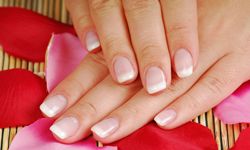
- Paint your nails in whatever color you like. You might want to start with a neutral color -- like black, white, or a pastel -- but you can choose more dramatic colors, depending on the look you're going for.
- If you're using something lightweight like glitter, use the wet polish as your adhesive. For heavier embellishments, such as beads and crystals, wait for your polish to dry, then use nail glue to attach whatever 3D pieces you're using.
- o matter what type of embellishment you're using, finish with a coat of top coat to help secure your art to your nail. The only exception to this rule is bows, because a top coat can mash them down and make them look a little funky.
Advanced Nail Art Ideas
Once you get the hang of adding embellishments, you can get even more creative. Try some of these fun techniques to mix things up a little bit:
- Use two polish colors. Paint one or two accent fingers in a different color that coordinates or contrasts with the rest. Your pinky or ring finger is a good choice for an accent nail.
- Play with embellishment colors. Sure, you can use pink crystals on each nail bed, but you can also pick up crystals in coordinating or contrasting colors. For example, you can arrange Swarovski crystals in shades of pink from lightest at your pinky to darkest at each thumb for a trendy ombre effect.
- Make nail caviar. One technique Amanda suggested is using nail glue to glue sprinkles – yep, like for a cake sprinkles! – onto your nails. Paint over them with clear polish for a festive look or with opaque polish to make your nails look like caviar. Salt can also give you a fun, caviar-like effect.
- Mix and match embellishments. Just because embellishments come in a pack together doesn't mean you have to use them that way! Combine your zebra nail decal with a cute, neon miniature bead or add some glitter to your nail before placing a bow.
Need some 3D inspiration? You can find awesome nail art ideas at SloDive or Nail Art 101. Nail art is all about fun, so experiment and see what works!
Advertisement